Wednesday, January 14, 2015

New year, new patterns!

2014 flew by and left me in its dust!  I think it was one of my busiest years ever, and I spent almost zero time in my sewing and crafting room, except for a last-minute, harried rush of small Christmas gifts.  I often give lip service to the idea of needing to take time for oneself, but I ran myself ragged and the way I felt was a real kick in the pants.

Now I finally have three in school and some time to myself, so I have dubbed this the "Year of Me."  We have just found out we are moving to Germany this summer, so I don't need to worry about finding a job until we move.  With that in mind, I've spent a lot of my newfound spare time taking care of myself physically and spiritually, which is having a tremendous positive impact on my life.  I have been making medical appointments that are a decade overdue, spending time doing the things I love, organizing the house, volunteering for causes that move me, and more.  Still busy, but it is a much more healing energy.

So what does this mean for the blog?  It means there's lots of good stuff coming up!  Here's  a quick look ahead:

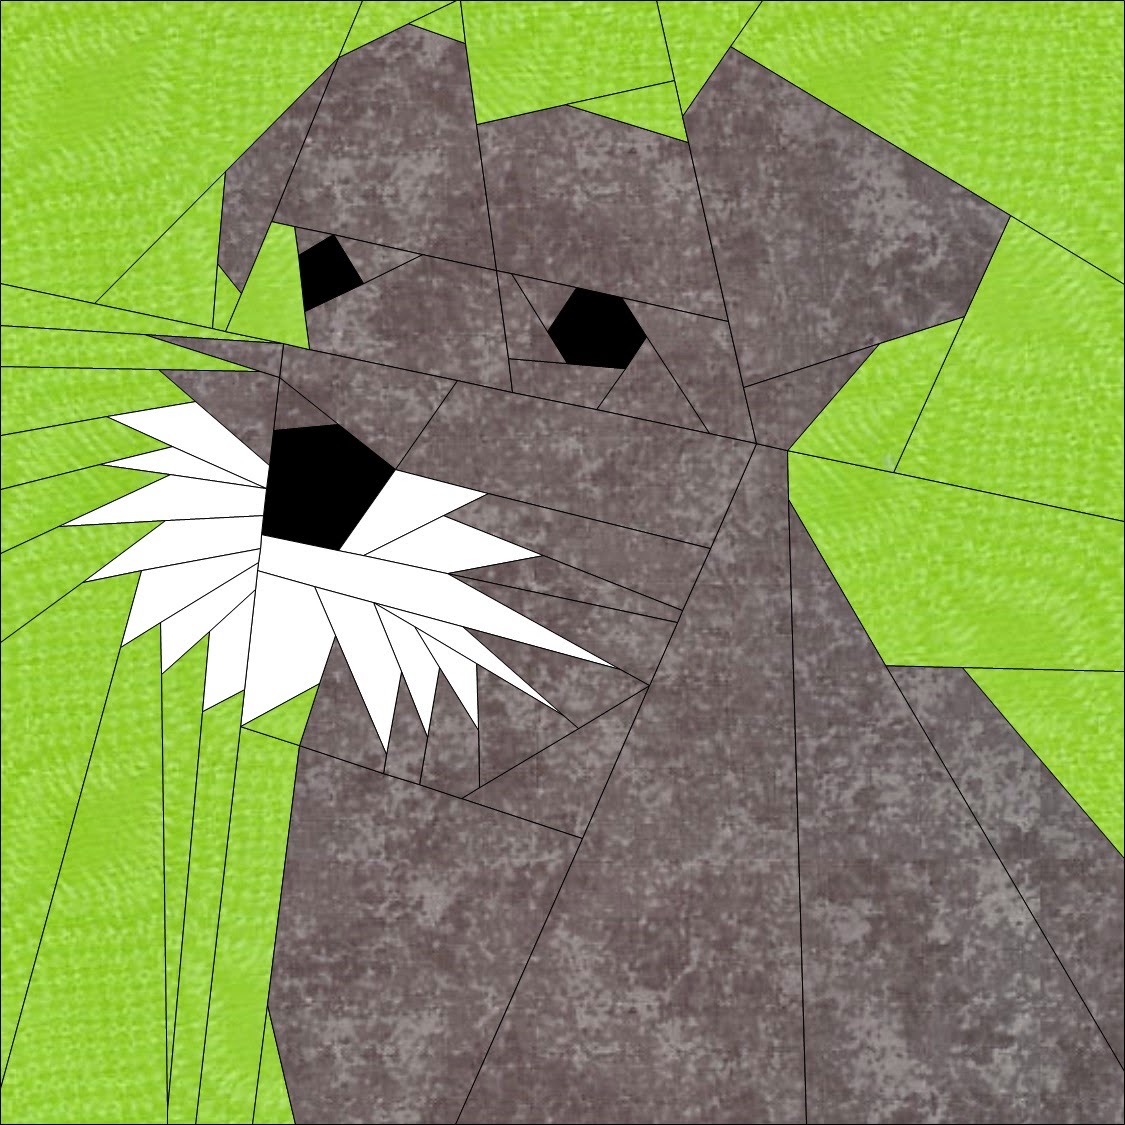
Right off the bat, I have some patterns that have been tested and are ready for release in the next couple of weeks.  They include the Grinch, a wire hair fox terrier, and a miniature schnauzer.  At this point I am not planning on doing more dog breeds (I made mini quilts for family members who owned these breeds), but if you have a specific request, please let me know and I can whip one up!


Grinch quilt block
The Grinch has been tested and will be released on FiS soon!  You can find his pattern on Friday on Craftsy and the blog.  Hopefully I can get a tester for Cindy Lou Who and Max soon so that they can join him.


Miniature schnauzer quilt block
"Freddie," the miniature schnauzer, is awaiting release on Craftsy.


Wire hair fox terrier quilt block
"Willie," the wire hair fox terrier, has also been tested and will be on Craftsy soon.


I will also be releasing weekly test results for blocks from the Game of Thrones quilt that I designed for my husband.  I have to admit that I'm not a fan of the books or show, simply because I have never gotten around to diving in to them, but I am super excited to do this for him.  At this point the plan is to release a block each week, but if any blocks need to be reworked once I start on them it may take an extra week to fix the pattern.  If you are interested in testing this along with me, I can email you the pattern files.  I just ask that you allow me to share your finished design on the blog.


Game of Thrones quilt
Hopefully, this will be the finished project!

Throughout the year, I'll be sharing my blocks from the 2015 Project of Doom quilt-along hosted by Jennifer Ofenstein over at Fandom in Stitches.  I'm going to try to learn how to use an embroidery machine to do my book titles, so you can share in my (mis)adventures there.  :)

Finally, I will be without a sewing room for a good portion of the fall, due to our move.  Therefore, I have set up a BOW quilt-along featuring the 12 days of Christmas that will be released in the late summer and early fall.  That should give everyone ample time to quilt and bind their quilts before the Christmas season.  I, for one, could definitely use less stuff on my to-do-list during the actual holidays.  This will be a buy-in BOW project, with each pattern costing only 2$.  The patterns will be available through Craftsy.

Christmas quilt-along


12 Days of Christmas quilt
This will be the finished 12 Days of Christmas quilt.

Whew!  I think that's about it for now.  I will also be trying to finish some UFOs, and may share some other blocks as they are tested, but I don't expect to be doing a lot beyond these items this year.  Stay tuned, and as always, I welcome your comments, questions, and suggestions!

Wednesday, April 16, 2014

16 Supernatural patterns!

I had grand plans this month of getting things finished.  I really did.  I have the remainder of my Christmas reveals to get through; a tested Totoro pattern, untested Totoro pattern, and Totoro quilt layout; a set of redone Frozen patterns (now larger! and in color!); a set of five new Eragon patterns ... the works.  But instead, Gmail and Blogspot decided they were going to war with my computer, which is a huge problem in a world that runs according to Google, and I had a few blog post and important email casualties.  I gave the posting a rest and focused on designing patterns instead. It was a refreshing change of pace and a lot more relaxing use of my "me" time. I managed to add to the two Supernatural patterns I had already, and now I have 16 patterns available for testing.

If you would like to test any of these patterns, simply download the pattern and test away! I just ask that you send me a completed picture of your block to be shared on the blog, and notes on any revisions that need to be made.

Let me know if any of the links aren't working or patterns aren't downloading properly, and I'll get that sorted out straightaway.


Available Supernatural Patterns
PatternPicturePattern LinkTested?
Angel Wings
Yes
Azazel

No
Bobby

No
Bullet

No
Castiel

No
Crowley

No
Dean

No
Demon Tablet

No
Devil's Trap

Yes
Jo

No
John
Winchester

No
Kevin Tran

No
Lucifer

No
Naomi

No
Ruby

No
Sam

No

Sunday, March 2, 2014

Christmas Reveal: Batman Quilt

My little nephew has so many passions, I never know if his latest favorite thing is still his favorite thing when I am making him gifts.  This Christmas, though, I think I hit the nail on the head.  I made him a Batman mini quilt to go along with a Batman figurine and a Batman shirt.  The whole kit seemed to go over pretty well.

This is, of course, another Fandom in Stitches design, this time by my quilt designing idol, Jennifer Ofenstein.  Now, I have to pause for a minute to mention the Fandom in Stitches designers.  They are all volunteers and contribute so much in time and designs that  are open for everyone to use.  Most importantly, every time I have had a question, they are there with courteous and helpful advice and support.  Part of the reason I want to design and offer free fandom patterns -- besides the fun I have doing it -- is to offer back what I can to this incredible community.

I took Jennifer's 5" block and blew it up to 20".  I kept the colors neutral with just black and grey, then added extra black sashing and some Batman logo sashing all around.

Batman Quilt
Finished Batman quilt.

Batman Quilt
The logo.
I can't honestly remember the exact shop were I got the Batman fabric (I bought it off eBay), but to the best of my knowledge, it was from Over The Rainbow on Camano Island, Washington.  I didn't realize they were fairly local to me, and my fabric arrived the day after I ordered it.  I have since ordered several fabrics from them and been very happy with the products and the speed with which my orders arrive.

I zigzag stitched around the logo to keep the quilt layers together, then outlined the bat a quarter inch inside the seam lines.  I then stippled the bat for some interest and bound the quilt.  The backing was the same Batman fabric I used in the sashing.  Except for accidentally cutting the seam allowance off one section for the first time ever when I didn't have enough fabric to redo that section (whoops!), the whole thing came together quite quickly and easily.

Batman Quilt
Stipple quilting on the bat.  You can hardly tell I
had to add in extra sections after cutting off
the seam allowance.  :)

You can find the pattern for the Batman logo here.


Saturday, March 1, 2014

Christmas Reveal: Batiki Bird

Last June my grandmother gave me an amazing book for my birthday called Pretty Little Mini Quilts, compiled by Ray Hemachandra.  Normally I think that buying a quilter a book of patterns is a little like buying someone underwear, because it is highly personal and you never know exactly what they will like.  However, she managed to hit it right on the head.  This book is now my go-to for mini quilt gifts.  There is a wide range of techniques represented, and plenty of different motifs.

So for Christmas, I wanted to make my mother-in-law a little quilt.  My mother-in-law is a flamboyant, gregarious woman to say the least, and I wanted to make her a quilt that captured her spirit.  The "Batiki Bird" pattern by Sarah Ann Smith just screamed out her name to me.  Bright and tropical and plenty of fun ... plus I could see myself not having to do any major free motion quilting since this would only be my second try at it.

Batiki Bird Quilt
My completed "Batiki Bird" mini quilt.  Pattern by Sarah Ann Smith.

I think this was one of my favorite fabric store trips.  The blue I found for the binding is probably one of my favorite batiks I have ever found.  It is one of my favorite teal-y (tealish?  tealesque) colors, and I need to make some couch pillows or something for myself with the leftover.

Batiki Bird Quilt
All finished and bound up.

Once I assembled the quilt, which is actually fairly easy and incredibly forgiving, it was time to quilt.  That was a bit of a nail-biter for me.  I started by outlining the tree and the bird a quarter inch away.

Batiki Bird Quilt
I managed to find the perfect orange scrap for my bird in my stash.

Then I added straight lines up and down with some leaves popping off the sides every once in a while.  To be quite honest, that's how I left it because the idea of doing more really intimidated me.  Those swirly vines weren't there when I wrapped up the gift and stuck it under the tree.  But then my son got into the Christmas presents and changed my mind.  We were getting together at the end of January for Christmas with the in-laws, and he just couldn't understand why there were still unopened gifts under the tree after Christmas.  He brought the unwrapped quilt to me ("Present!"), and I decided since I had practiced more on several other quilts, I would add some swirly vines in between the long lines.  I'm glad I did it, because it added a lot more to the quilt.  Still not great, but at least it doesn't look barren any more.  :)

Batiki Bird Quilt
It may be sad,  but it's quilting.

When I zigzag stitched my applique on, I elected to use the same red-orange thread on the back of the bird as I did on the front.  I love the pop of color on the back of the quilt.  It's not often that I enjoy the look of the backs of my quilts, but I sort of love that this echoes the design on the front in a more sedate form.

Batiki Bird Quilt
The back of the quilt.

You could play with so many different fabric selections for this quilt.  I highly recommend this particular book as well as the other books in the Pretty Little series.

Friday, February 28, 2014

Frozen Friday: Party Time!


I had grand hopes of revealing my quilt today, but unfortunately, I was out of the house all day today and now it is too dark to take pictures.  I thought I would have the afternoon to take pictures and blog, but I had to unexpectedly go to a school assembly today to see my daughter get a character award for "Acceptance."  No better reason to miss out on a scheduled posting.  :)  I will be out of town this weekend to take part in the Hot Chocolate 5K, so I already have other blog posts written and scheduled to come out Saturday and Sunday.  Don't despair; Monday you can look forward to the pictures of the completed quilt.

But we can still have our Frozen Friday, because in lieu of that, I have pictures of our Frozen party to share!  We made a winter wonderland out of the house and had seven wild little girls invade it.  That was six days ago, and I am just starting to recover.

My birthday girl!

My little ones getting ready for the party.

Every girl took home a blueberry lollipop and one of these little "build a snowman" kits.  Just throw three large marshmallows (body), two mini marshmallows (feet), two stick pretzels (arms), five chocolate chips (eyes and buttons), and a piece of candy corn (nose) in a sandwich bag and add a topper.  This is not my unique idea, but I've seen it in so many places I wouldn't know who to credit.  I also printed up water bottle labels that said "Melted Snow" and had a picture of Olaf in summer, then taped them on water bottles.  These were a huge hit with the girls, especially when they got to add their own water flavorings.

Another huge hit was the hot cocoa bar.  I used what is normally my menu board and drew Olaf on it.  Let's just say that I have a lot more respect for Disney animators after several attempts at that.  We put out hot cocoa in different flavors, marshmallows, Andes mints, caramel, and whipped cream.  There was a run on the Keurig machine for the hot water, and soon everyone was settled in with a warm cup of cocoa.


We had plenty of purple and blue decorations.  We covered our walls with small snowflakes cut out of blue vinyl.  Sparkly snowflakes and acrylic "ice chunks" were strewn about the tables.  We strung balloons all through the downstairs using a needle and thread, which was an idea I found on Pinterest.  It worked great!  And I just happened to have PartyLite lanterns with snowflake patterns that were perfect for the party.  We even made magic color changing drinks by dropping blue food coloring into the cups, pouring ice on top, and then pouring clear pop on top.  As the pop bubbled, it turned blue.  Mini carrots served as snowman noses for a snack before gorging on pizza, and we served blue Jell-O in individual packs. Our cake had a bit of a sliding mishap because there was so much filling, but we told everyone that it had melted in the summer warmth and moved on with life.


I made the prizes for our "pin the nose on Olaf" game.  I decided to try making sugar lollipops for the first time, and I actually had a blast.  They were much easier to make than I anticipated.  We had large snowflakes and little stars.  Just a week earlier, my mom had given me some LorAnn flavorings in blueberry and mint that she didn't plan on using.  I threw a few drops of the blueberry in, and it turned out great.  Since I had extra sugar left after filling my molds, I put the rest in a pie tin and created "ice shards."


We needed plenty of activities to keep the girls busy for the entire party, so we set up a necklace-making station.  The girls picked a precut 1-inch character circle (not shockingly, every girl wanted Elsa), sealed it with an epoxy seal, glued it into a pendant back, and added a chain and an accent bead.


We also made a borax snowflake station.  Each girl created a snowflake out of a pipe cleaner, then suspended it in a jar.  The girls measured out their borax and poured it in, then I took them all to the kitchen and added boiling water.  We have been watching our snowflakes grow crystals ever since.

Everyone seemed to have a really good time at the party.  My daughter seemed to think it had everything she could have possibly wanted, so I think I'll go ahead and put this one in the "win" column.  Now it's time for me to get planning a dragon party for her big sister for June!  If you have any good ideas for that one, please let me know in the comments.  :)

My mother made this amazing gift topper for a birthday gift.  Makes me think there really might be a "crafty gene."  ;)